Discover how to use Grammarly on Mac in our guide.
I use Grammarly and GrammarlyGO on my Mac Studio and Macbook computers regularly. It’s great for ensuring a piece of writing, like an article or email, is clear, concise, and error-free. Fortunately, using Grammarly on a Mac is easy. And you don’t need to install a lot of plugins or add-ons.
In short: Download the Grammarly desktop app for Mac from the official website. Once you’ve downloaded, installed, and logged into the app, you can use Grammarly and GrammarlyGO in any application immediately by clicking on the G icon.
Grammarly for Mac works with your favorite writing tools, including Microsoft Word, Pages, and Google Docs. Once activated, you can use Grammarly to check your writing and access its AI-powered writing assistant in real-time. For more information, read our Grammarly review.
| Feature | Grammarly Basic | Grammarly Premium (Mac) |
| Basic grammar and spelling checks | ✔️ | ✔️ |
| Clarity and conciseness suggestions | ❌ | ✔️ |
| Vocabulary enhancement suggestions | ❌ | ✔️ |
| Genre-specific writing style checks | ❌ | ✔️ |
| Plagiarism checker | ❌ | ✔️ |
| Advanced punctuation, grammar, and sentence structure checks | ❌ | ✔️ |
| Personalized writing insights and suggestions | ❌ | ✔️ |
| Premium customer support | ❌ | ✔️ |
| GrammarlyGO | ✔️(limited) | ✔️ |
We tested dozens of grammar checkers, and Grammarly is the best tool on the market today. It'll help you write and edit your work much faster. Grammarly provides a powerful AI writing assistant and plagiarism checker.
Contents
How to Install Grammarly on Mac
If you’re a Mac user and want to install Grammarly, don’t worry, it’s straightforward. You can install Grammarly on your Mac by following these simple steps:
Step 1: Download Grammarly for Mac
You can download Grammarly for Mac from the Grammarly website or the Mac App Store. First, set up your Grammarly account on Grammarly.com, then log into your account via your browser on Mac.
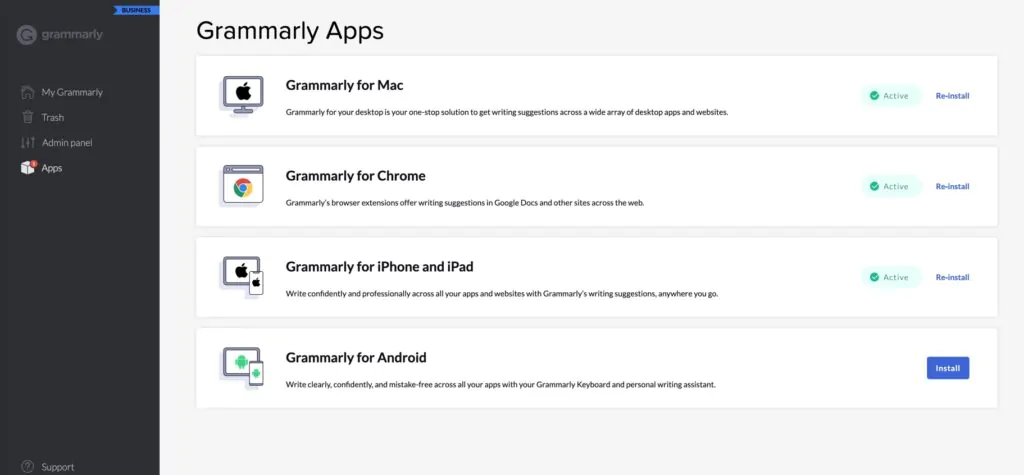
- On the web editor, and click on the “Apps” tab.
- Click on “Download” under the “Grammarly for Mac” option.
- Once the download is complete, open the downloaded file.
Step 2: Install Grammarly on Mac
Once you have downloaded the Grammarly app, install it for your iMac or MacBook.
- Double-click on the downloaded file to open it.
- Drag the Grammarly app icon to the Applications folder.
- Open the Applications folder and double-click on the Grammarly app icon to launch it.
- Log in to your Grammarly account or create a new one if you don’t have an account yet.
And that’s it! You have successfully installed Grammarly on your Mac. Now you can use it to check your grammar and spelling in real time while you write.
How to Use Grammarly on Mac
If you’re a Mac user, you can use Grammarly to help you write better and more effectively. Here’s how to use Grammarly on Mac:
Step 1: Launch Grammarly on Mac
To launch Grammarly on Mac, simply open the Grammarly desktop app and log into your account. It now works in the background.
Step 2: Configure Grammarly for Mac Settings
Before you start writing with Grammarly on Mac, configure your settings. To do this, click on the Grammarly icon in your menu bar and select “Preferences.” Here, you can configure your writing goals, set language preferences, and choose which types of errors you want Grammarly to check for.
Step 3: Start Writing with Grammarly on Mac
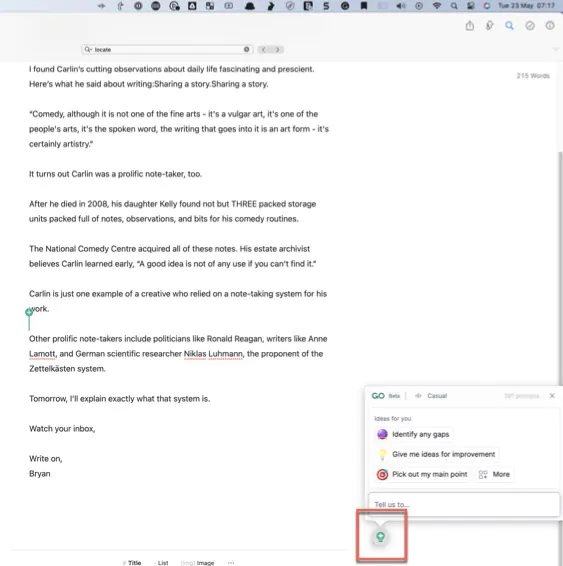
Write in your application as normal i.e., Pages, Word, Outlook, Text Edit. As you type, Grammarly automatically checks your writing for grammar, spelling, and punctuation errors. If Grammarly detects an error, it underlines it in red and provides suggestions for correction. It underlines sentences to edit for clarity in blue.
Step 4: Access Grammarly’s Reports on Mac
If you need more suggestions and reports, click on the Grammarly icon or floating number. This triggers and pop-up displaying Grammarly’s four key reports: correctness, clarity, engagement, and delivery. You can click through these reports and suggestions individually, much like when using the web editor or plugin for Safari or Chrome.
Step 5: Using GrammarlyGO On Mac
The process for using GrammarlyGo is almost identical. Simply click on the Grammarly icon, look for the GrammarlyGo icon, and input your prompt. If you’re unsure what to ask, GrammarlyGo will provide suggestions like: “Identify gaps” or “Give me ideas for improvement.”
Currently in beta, Grammarly Go works best on Mac when analyzing small chunks or sections of a piece of writing. I particularly like its ability to summarise ideas. You can also use it for basic research instead of opening up a web browser.
Grammarly for Mac Tips
Disable Grammarly for Mac: Some users find Grammarly for Mac’s suggestions intrusive when working on a draft. You can disable it for 30 minutes in any writing application or indefinitely by first on the Grammarly icon and then on the gear cog.
Reactivate Grammarly for Mac: To reactivate Grammarly, simply reopen it with Finger or click on the Grammarly icon in your menu bar. It Grammarly is not showing in a Mac app, click on the Grammarly icon, navigate to settings, and then your block list. Now check the app in question isn’t blocked.
Customize Grammarly for Mac: If you find any of Grammarly’s suggestions incorrect or off-putting, review the writing styles section in settings to turn off or on specific rules.
For more advice like this, read our article packed full of Grammarly tips and tricks.
How to Use the Grammarly App on iOS
You can write on your iPad or iPhone and then upload the results to Grammarly by following these steps.
Step 1: Install the Grammarly App for iOS
To use Grammarly on iOS, you must first install it. Here’s how to do it:
- Open the App Store on iPhone or iPad
- Search for the Grammarly app
- Install it and log in
Step 2: Customise Your Grammarly iOS Settings
Before you start writing with Grammarly for iOS, configure your settings. To do this, tap Account in the app. Here, you can configure your dictionary and language preferences and pick which errors you want Grammarly to check for.
Step 3: Upload A Document to the Grammarly Editor
Alternatively, write in another application on iOS. Save the results to iCloud. When done, open the Grammarly Editor, tap upload, and select the file from iCloud. Now, you can edit it and export or share the results.
Step 4: Write in the Grammarly Editor
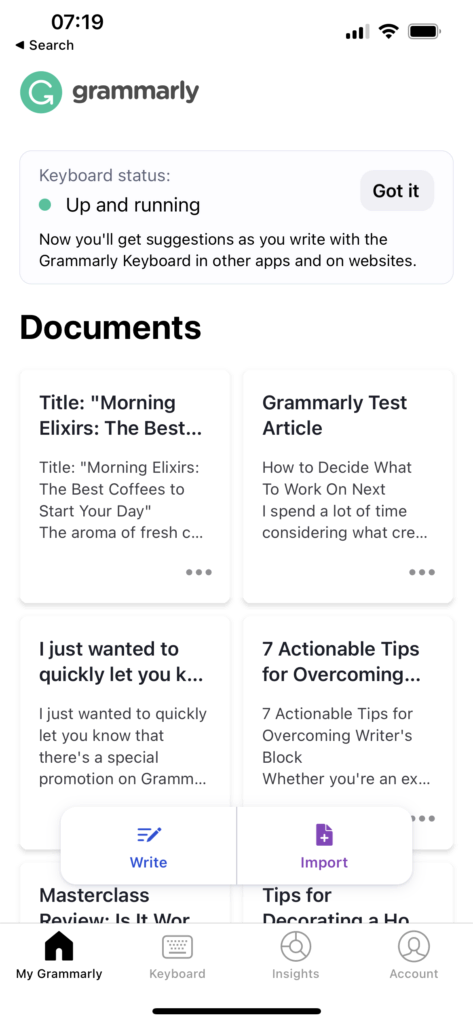
You can write directly in the Grammarly Editor on iOS. Simply open Grammarly, tap “Write”, and get to work. Grammarly will check your writing and provide options for sharing and exporting the results.
Step 5: Upload A Document to the Grammarly Editor
Alternatively, write in another application on iOS. Save the results to iCloud. When done, open the Grammarly Editor, tap upload, and select the file from iCloud. Now, you can edit it and export or share the results.
Step 6: Access Insights
Grammarly for Mac and iOS provides insights about common grammar mistakes via the app, notifications, and email. You can access these at any time by tapping the insights icon.
How to Use Grammarly Keyboard on Mac
You can use the Grammarly Keyboard to enhance your writing if you’re a Mac user. Here are the steps to use the Grammarly Keyboard on Mac:
Step 1: Install Grammarly Keyboard on Mac
To use Grammarly Keyboard on iOS, you must first install it. Here’s how to do it:
- Open the App Store on iPhone or iPad
- Search for Grammarly Keyboard (not the app)
- Install it
- Alternatively, open up the Grammarly Editor for iOS and it will prompt you to install the keyboard directly and enable it
Step 2: Enable Grammarly Keyboard
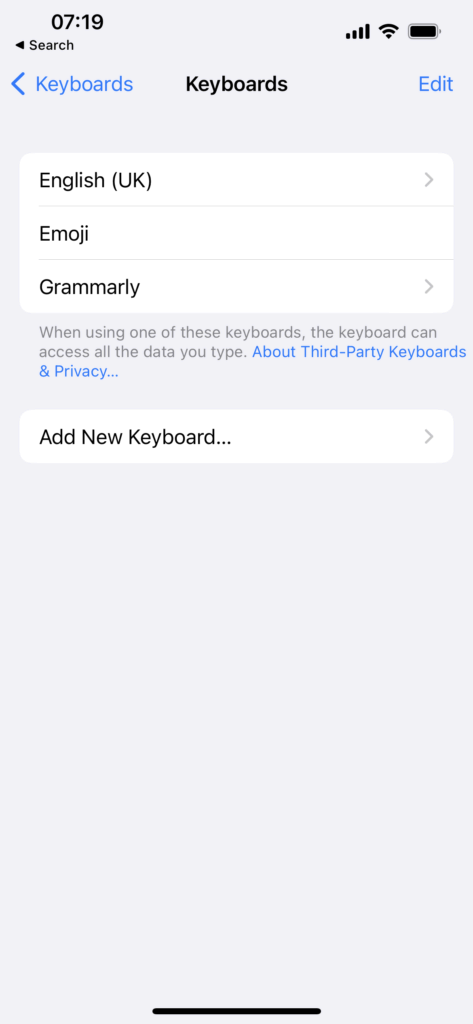
After installing the Grammarly Keyboard on iOS Mac, you must enable all permissions. Grammarly should prompt you about what settings to turn on, but if it doesn’t, simply navigate to “Settings”, then “Keyboard”, and then “Keyboards”. Now, enable “Full Access” for Grammarly. Then, tap “Allow”.
Step 3: Start Writing with Grammarly Keyboard on Mac
Once you’ve installed and enabled the Grammarly Keyboard on your Mac, you can start to check and edit text on iOS. Write as normal on your Apple device.
When done, click the Grammarly icon to access its grammar and spell checker. It will scan your work and propose suggestions you can apply or reject at a tap. You can switch to and from the traditional keyboard anytime by pressing the globe icon at the bottom left of the screen for several seconds. Using Grammarly Keyboard on Mac is easy.
Following the above steps can enhance your writing and avoid embarrassing mistakes. If you want to get more value from this tool, don’t forget to claim a Grammarly coupon.