If you want to learn how to make an audiobook, our 10 step guide explains what equipment you need and the nuts and bolts of audiobook production.
According to Deloitte, global audiobook sales reached over four billion dollars in 2020, that’s a 2% year-on-year increase.
As a self-published author, audiobooks form an increasing proportion of my monthly revenue from book sales. It’s easier than ever for indie authors to create or self-publish their first audiobook. You need the right equipment, some technical know-how and a budget for working with an audiobook narrator.
In this guide, I’ll explain how to make an audiobook, based on my experiences narrating and self-publishing the Art of Writing a Non-Fiction Book and several other audiobooks.
Contents
- Should You Create an Audiobook?
- Hiring an Audiobook Narrator
- Narrating An Audiobook
- How Long Does it Take to Narrate an Audiobook?
- Step 1. Complete Your Manuscript
- Step 2. Buy The Right Audio Equipment
- Step 3. Prepare Your Homestudio
- Step 4. Check the Noise Floor
- Step 5. Print Out The Chapter
- Step 6. Warm Up Your Voice
- Step 7. Narrate
- Step 8. Send Your Files to Professional Audio Editor
- Step 9. Proof Your Audiobook
- Step 10. Publish Your Audiobook
- How To Make An Audiobook: The Final Word
- How To Make An Audiobook: FAQs
- Resources
Should You Create an Audiobook?
Audiobooks are a great way of earning more income from your writing. Many readers today have smartphones and lots of books to get through. Plus thanks to Apple CarPlay and Google Auto, internet audio is available in cars.
So, why not give readers the option of listening to your book on the go?
Indie authors in several countries can publish their audiobooks on Audible via ACX too. When ACX added Ireland to their list, I jumped at the chance to create an audiobook of The Art of Writing a Non-Fiction Book. Alternatively, authors can use popular audiobook production services like Findaway voices.
Narrating a book will help you develop an ear for writing that sounds good. It’ll also help improve your book’s natural flow. It’s hard to narrate clunky and confusing language, which means revising for clarity… and that’s a good thing for your readers and listeners.
Hiring an Audiobook Narrator
I hired a professional narrator for several of my books. A potential narrator will expect an extract first. They’ll record a sample chapter for you to listen to. While reviewing this sample consider:
- Does their voice and accent match the tone of your work?
- How do they handle unusual words?
- Can you hear any odd background noises?
- Do they narrate slowly or quickly?
I waited until I received ten samples before selecting a narrator. When I hired voice actors and professional narrators, I agreed on a set fee for the contract as I didn’t want to hand over a cut of book royalties. I paid approximately $1500 for a five-hour audiobook, edited and mixed for ACX. Some voice talent wanted to charge more, but this was beyond my budget at the time.
However, if money is an issue some audiobook narrators will take a reduced fee for a cut of the audio rights. Narrating a book yourself is cheaper again.
Narrating An Audiobook
First, consider if you’re writing fiction or non-fiction.
Non-fiction, like self-help or business, is easier to narrate than fiction, like thrillers or mysteries. You don’t have to spend as much time worrying about characters’ voices or putting on accents.
There’s also something reassuring about hearing the author of a non-fiction book narrate his or her materials. That said, you can narrate your fiction book, but it’s a little more work.
Next up:
Are you comfortable speaking in front of a microphone?
Narrating an audiobook is a performance. It’s your job to entertain, inform or inspire your readers…. or in this case, listeners.
That could mean enunciating certain words, using dramatic pauses, and learning when to talk loudly or quietly. It’s a different skill to writing.
Also, consider:
Can listeners understand your accent?
As an Irish person, I sometimes speak as fast as a race-horse. When people from outside of Ireland hear me speaking for the first time, they often look at me with a confused expression.
While narrating, I forced myself to sloooowwww dowwwwn so listeners could understand what I was saying. Finally:
Are you comfortable editing your audiobook… or do you have the means to hire a professional audio engineer?
About 10 years ago, I worked as a radio producer for a news station in Ireland. But, please don’t let this put you off. You don’t need technical skills to produce an audiobook.
You see, I’d forgotten most of my radio production skills and to be honest, I wasn’t a very good producer.
While making an audiobook, I wanted to avoid any editing where possible. Instead, I relied on an audio engineer to take care of my files.
How Long Does it Take to Narrate an Audiobook?
It takes between five and ten minutes to record 1,000 words, depending on how fast you speak. And expect to spend at least an hour recording and/or editing for every 15 minutes of audio.
I narrated a 40,000-word non-fiction book at a rate of two chapters a day. It took me about three weeks to finish narrating my work. I also checked each chapter before narrating with Grammarly. An experienced audiobook narrator could probably narrate one faster. My advice?
Be realistic!
Narrating an audiobook isn’t a small or quick little project.
You have to read through each chapter aloud, narrate each chapter and then work with an audio engineer or edit your files yourself.
Plus, you will need to listen back to the final audio file and check it for errors.
Unless you have the freedom to spend all day narrating a book, I recommend setting aside at least four weeks to narrate your audiobook. I’m assuming you’ll dedicate at least an hour a day to narrating your book.
I also recommend allowing for contingencies such as having to re-record a chapter.
Tip: TheVoiceRealm.com can help you calculate how long it will take to narrate your book.
Step 1. Complete Your Manuscript

There’s little point in narrating an audiobook if your book isn’t finished. Narrating and writing at the same time is too much work. I made my audiobook only after preparing the book for publication, getting my cover.
Ideally, narrate a manuscript that you’ve already sent to an editor, beta readers, and a proofreader. I get that a book is never really finished… but aim to narrate a manuscript that’s as close as possible to the finished version. Believe me, writing, editing, and narrating a book at once is a recipe for overwhelm.
This way, you can reduce time spent re-recording sections of your book.
Tip: Keep a notepad and pen nearby in case you spot an errant typo while narrating.
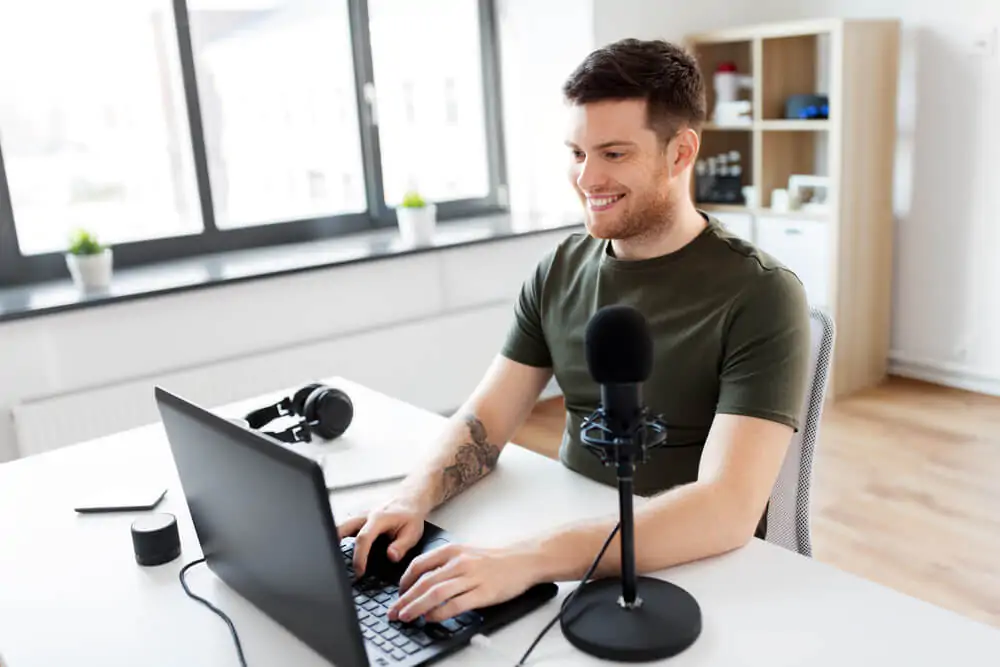
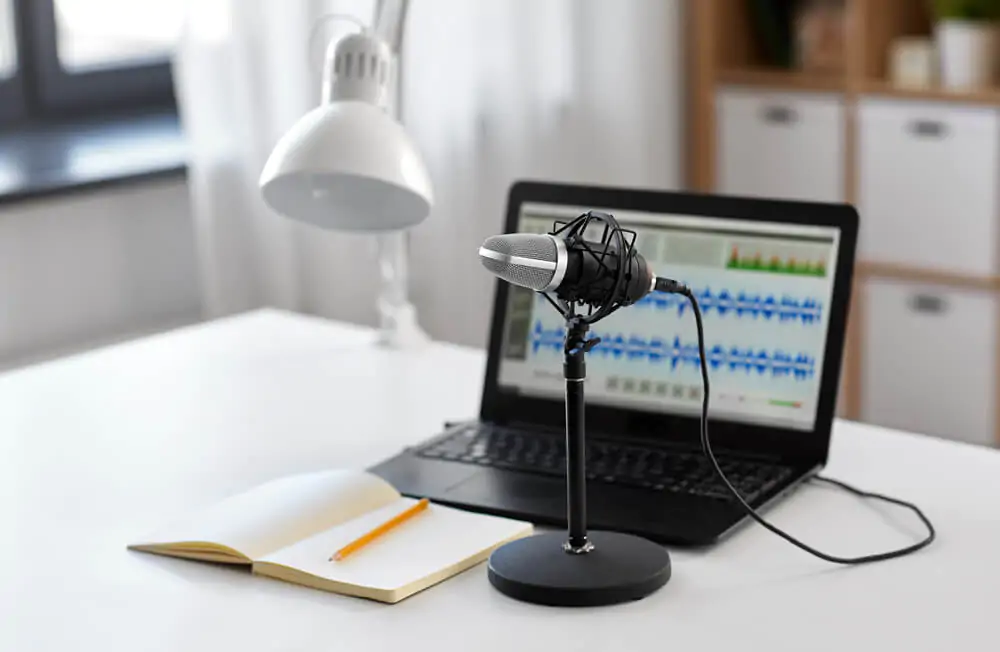
Step 2. Buy The Right Audio Equipment
I spent about $300 on equipment and another $250 working with an audio engineer. You don’t need a fancy studio or large budget to narrate and edit an audiobook book.
My set up or approach isn’t definitive, but it should give you an idea of what to spend on making an audiobook.
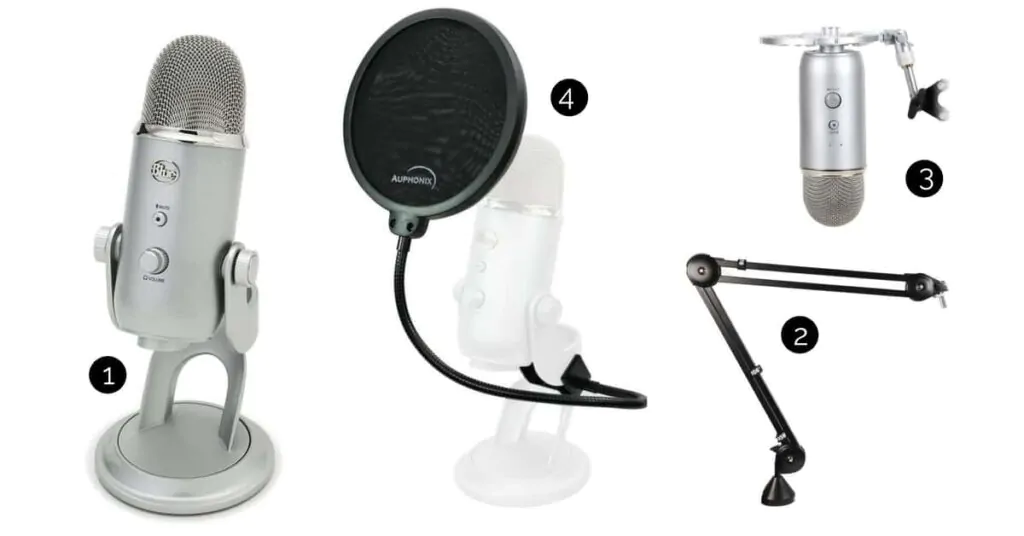
- Blue Yeti USB microphone (1) for narrating my book. Cost: From USD128
- RODE PSA1 Swivel Mount Studio Microphone Boom Arm (2) to move the microphone near my mouth. Cost: From USD99
- The Auphonix Aluminium Shockguard (3) for the above microphone to avoid picking up vibrations from my desk. Cost: From USD29
- A pop filter (4) to prevent explosive popping sounds when speaking P or B sounds, e.g. “punch”, “break” etc. Cost: From USD19
- Audiobook editing software – I used Reaper. Other options include Garage Band and Audacity (both free).
- A small, quiet room – some narrators record their books in walk-in wardrobes as their voice sounds ‘softer’ and there’s less echo.
- A modest budget for hiring an audio engineer. Cost: I spent about $300 to hire an engineer from Eastern Europe via UpWork.
- A modern computer. I used an iMac, but I’ll presume you have one already.
- Headphones for monitoring yourself. If you don’t own a set, your phone’s earphones will do.
- Background music or a jingle for the introduction and conclusion to give your book a polished feel. I bought a track on Audiojungle. Cost: From USD7
Step 3. Prepare Your Homestudio
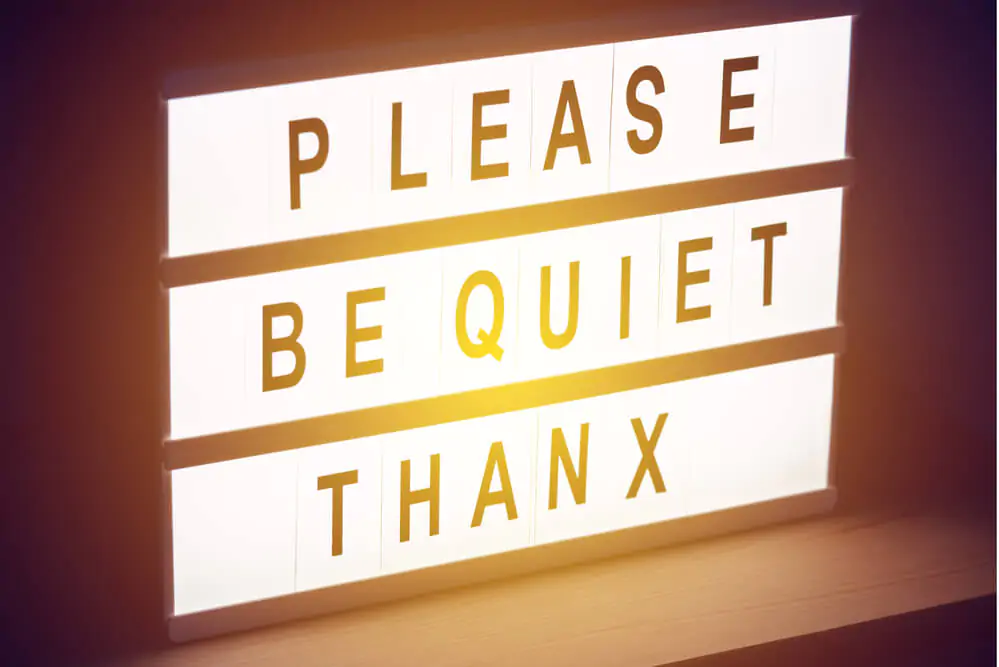
No, you don’t need to set up your equipment in a fancy studio… but the location of your recording space matters. You could record in a small room in your house or apartment or even a closet. I opted for my home office. I closed the curtains and blinds and dropped towels over the wooden floor and desk to reduce echo. Whatever your choice, eliminate all background noise.
Turn off your phone.
Close down anything on your computer that comes with noisy or distracting notifications. Let friends and family know what you’re doing… or wait until they’re out for they’re a few hours
Next, get your positioning right.
- Face your microphone head-on, i.e. not to the right or left
- Angle it at 45-degrees, titled away from your mouth
Tip: An ideal recording session is at least an hour-long, as you need to set up, warm-up and get into a state of flow.
Step 4. Check the Noise Floor
Turn on your microphone and record a minute or two of dead air. Listen back to this recording with headphones, and check if you can hear any unintentional noises like traffic outside or creaking pipes.
This is called checking the noise floor.
For our purposes, the noise floor is the sum of all noise sources and signals in a room other than what you’re saying or actively recording.
Each time you record a chapter, turn on your mic and record the sound of your room for at least thirty seconds and listen back to this recording.
For example, turning down the gain will reduce a hissing sound. Or the fan on your computer may be too loud. Your home studio could sound ok today, but that may change.
Repeat the same exercise, this time narrating a page of your book. While narrating, plug in your headphones or earphones so you can monitor for or hear odd sounds.
Listen back to your recording and adjust until you (or your audio engineer) are happy with the levels, quality, and so on. If you’re still unsure, record a chapter and send it to an editor to check before proceeding.
Tip: Place a towel over your desk beneath your microphone. This will help you soften the noise floor around your microphone and reduce echoes.
Step 5. Print Out The Chapter
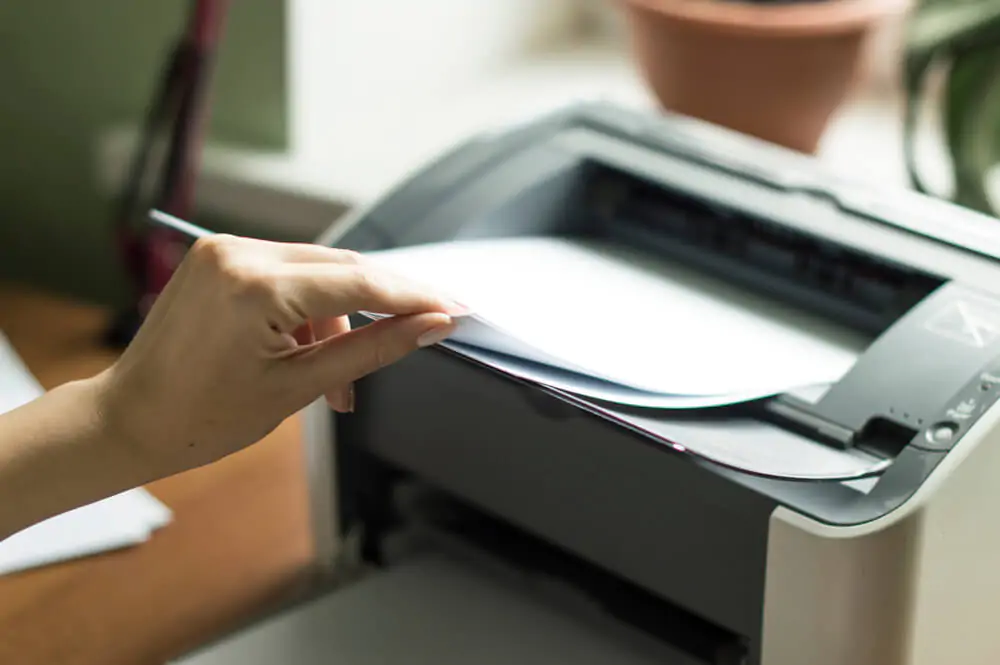
Print out the chapter you intend to narrate using a large double-spaced font. Prop the pages up on a document holder so you can transition from one page to the next without making much noise.
Alternatively, open your Kindle book on an iPad or tablet and prop it on a stand.
Tip: Keep your manuscript at eye level. If you narrate while looking down, it will compress your breathing and impact voice delivery.
Step 6. Warm Up Your Voice

An athlete stretches before a big race so they can run faster or lift harder. If you’re narrating a book, you should warm up too.
So before you record a version for editing, read the chapter in question aloud. You can record yourself and listen back if you want, but this first read-through isn’t the live version.
This practice will help your voice warm up so it doesn’t sound dry and croaky. It’ll also help you figure out where and when to pause and how to inject some color into your narration. You’re less likely to stumble over your words while narrating because you’ll be familiar with what you’re reading aloud.
While narrating, you’ll sometimes need to cough or clear your throat. So, keep a bottle of water nearby that you can sip from.
If you want more help, check out this guide to making your vocals sound professional.
Tip: Avoid sipping sparkling water while narrating. I drank from a bottle of sparkling water and ended up belching into the mic… not good.
Step 7. Narrate
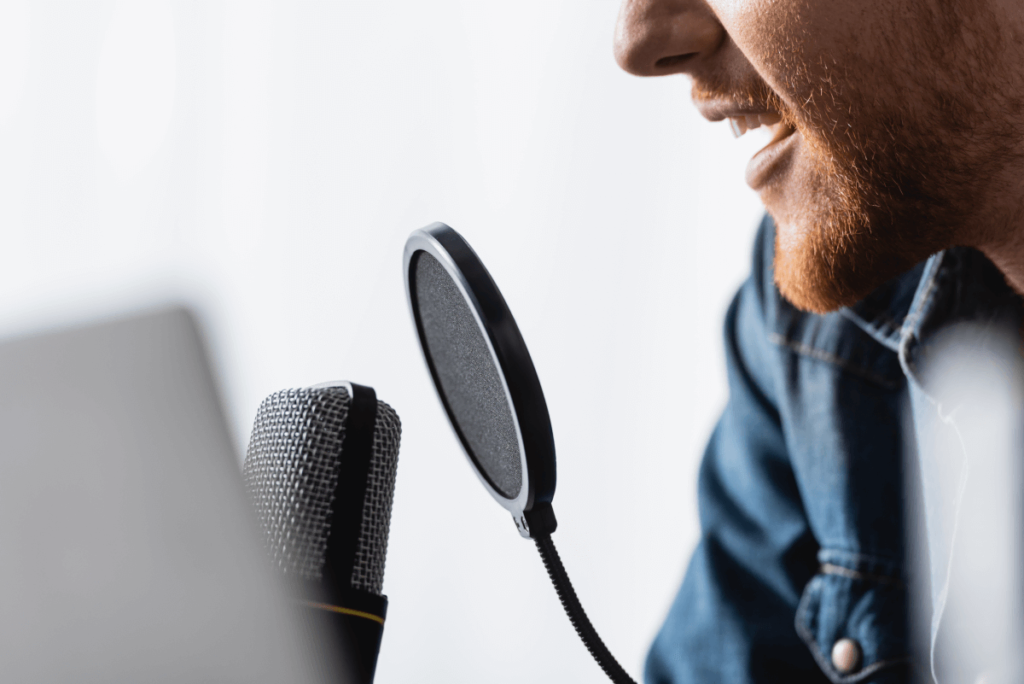
Your goal is to narrate several pages without interruption. If you haven’t narrated much before, don’t worry if you only manage a page or two. Getting into the flow of narration is why you need at least an hour of time.
I sat on a quiet chair, took care not to wear any clothes that make a lot of noise (e.g. wool), and kept my hands off the desk. I also took off all my Mr.T jewelry.
Then, I opened up a PDF version and turned on my microphone.
I let the microphone run for 30-seconds without speaking so my editor or engineer had some clean audio to work with.
Then, I began narrating.
Using a trackpad, I silently navigated down through the chapter.
You can read from a printout, but this approach meant I didn’t have to worry about the microphone picking up the shuffle of papers.
When I made a mistake, I re-read the sentence and kept on narrating the chapter in question.
Occasionally, I found an error in my manuscript or a sentence that didn’t sound right. I took note of what these were in a notepad and keep going until the end of the chapter.
This way, I avoided editing and narrating at the same time. On a few occasions, I re-recorded the troublesome sentences at the end of the audio file. I then asked the audio engineer to fix these issues.
I also monitored myself while narrating using my headphones, so I could hear any odd sounds that the mic picked up.
Tip: Identify mistakes for editing by clapping. This will help you (or the audio engineer ) find these sections faster, as the clapping sound is easily identifiable.
Step 8. Send Your Files to Professional Audio Editor
Unless you have solid audio editing skills, I recommend sending your files to an editor. They will find and fix audio errors you may miss and help master the files for publication. This frees you up to narrate faster.
I hired an editor to prepare my audio files for ACX on UpWork. This cost me around $200. He also exported each chapter as a separately labeled audio file.
Years ago, I worked as a radio producer. I could have self-edited these audio files, but it takes a novice or inexperienced audio engineer up to four times longer to edit an audio file.
For example, a 15-minute audio file can take an hour to edit. And so on.
So, it would have taken me 24 hours to edit a six-hour audiobook. This is time I’d rather spend writing, blogging, or even watching Netflix.
If you’re commissioning an audio editor or engineer:
- Find an editor or audio engineer that speaks English and has experience preparing books for ACX
- Agree on an hourly rate or a project rate within your budget
- Send them a sample chapter to review before starting work
- Agree on what they’ll do for you. For example, I asked my editor to export the finished audio files for me too.
- Ask them to check a sample audio file for quality, background noise, and other issues before you narrate a large part of your book
Tip: Buy a short jingle on Audiojungle and ask your editor to use this as part of the introduction and conclusion.
Step 9. Proof Your Audiobook
Much like with self-publishing a digital or paperback, you need to proof the audio version.
I listened to each of the audiobook chapters with a set of headphones. I also asked another person to help.
When I found an issue, like a popping sound, a mangled sentence, or a clumsy edit, I noted the time and recorded the issue in a spreadsheet.
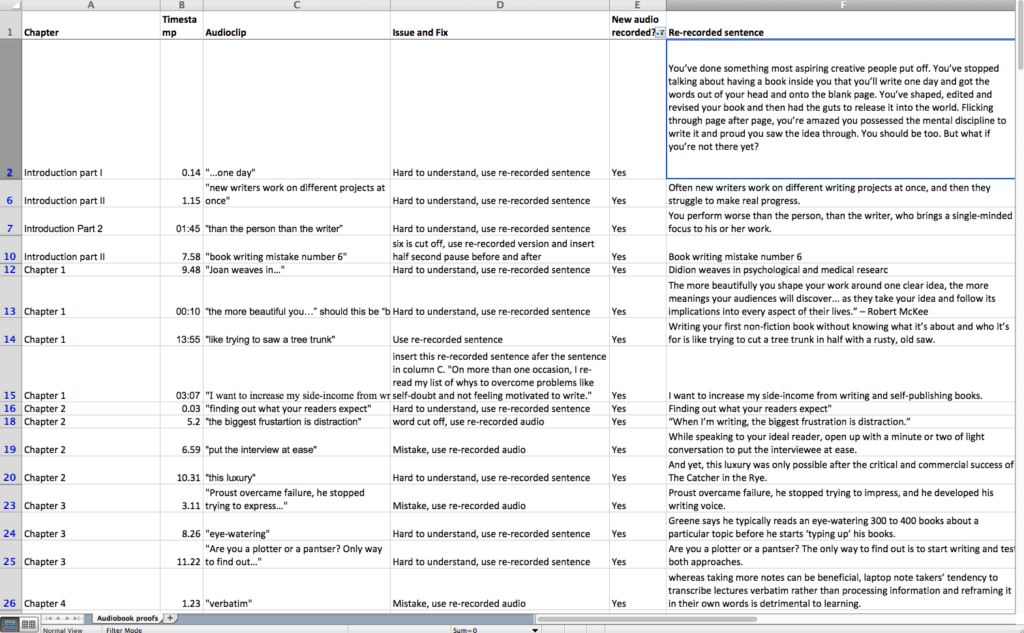
In some cases, I re-recorded certain sentences. Then, I gave all this to my audiobook editor to fix.
Tip: This spreadsheet saved my audiobook producer and me a lot of time.
Get my Audiobook Narration Spreadsheet
Step 10. Publish Your Audiobook

Once I was happy with the audio recordings, I uploaded each m4b file to ACX and submitted them for approval. I also contacted my book cover designer and asked her to create an audiobook cover for ACX.
I also uploaded a three-minute sample of an interesting chapter to capture the attention of would-be customers.
If you can upload photos to Facebook, you’ll have no problems uploading a finished audiobook to ACX. Remember to name each audio file to correspond to the chapter number or ask your audio engineer to do this.
It took about 10 business days to get approval from ACX and for my audiobook to go on sale. There were a few issues with my title’s description, which I resolved by contacting ACX support directly.
Tip: Use free copies of your newly published audiobook to attract reviews.
How To Make An Audiobook: The Final Word
It took me a lot of time to narrate The Art of Writing a Non-Fiction Book, proof the recordings, and re-record troublesome parts of this title.
I enjoyed doing it, but the process was more involved and tiring than I first realized.
With respect to professional audiobook narrators everywhere!
That said…
Narrating and publishing an audiobook is a great way to serve readers in different ways and even earn more money from writing.
It’ll help you improve your book’s quality, and it’s easier than ever.
All you need is a modest budget for the right equipment, a willingness to practice, and some time to get your audiobook right. Get this right, and you’ll earn your first audiobook sale in no time!
The Art of Writing a Non-Fiction Book is on sale on Kindle, print, and audio now.

- Audible Audiobook
- Bryan Collins (Author) - Bryan Collins (Narrator)
- English (Publication Language)
- 12/18/2017 (Publication Date) - Become a Writer Today (Publisher)
Resources:
- Joanna Penn from the Creative Penn explains how to use audio for book sales and marketing in her podcast.
- ACX have video lessons and more that will help you make an audiobook faster

- Tri-capsule array - 3 condenser capsules can record almost any situation.
- Multiple pattern selection - cardioid, bidirectional, omnidirectional & stereo.
- Gain control, mute button, and zero-latency headphone output.
- Perfect for vocals, musical instruments, podcasting, voiceovers, interviews, field recordings, conference calls. Signal to Noise: 100dB
- Compatible with Windows 10, Windows 8 (including 8.1), Windows 7, Windows Vista, Windows XP (Home and Professional), and Mac OS X (10.4.11 or higher), and requires a minimum of 64 MB of RAM(remove existing and upload).

- Superior: Our mic shock mount is crafted with optimized suspension bands to shield your Blue Yeti from vibrations, shock pops, and distortions. Premium protection to keep you sounding like a pro.
- Durable: The robust, ultra-reinforced, noise isolating shock mount for Blue Yeti mics keeps your set up secure, & your audio uncompromised - so you can create crisp recordings with confidence.
- Compact: At a portable 5.5" x 3.5" and weighing a mere 7oz, this lightweight Blue Yeti shock mount can accompany you anywhere - the perfect size for professional quality audio on the go!
- Easy: Compatible with Blue Yeti, Blue Yeti Pro USB, & Blue Snowball, our Blue Yeti shock mounts have multi-sized threads (3/8" & 5/8") to fit both US & European mic arms - no adapter necessary.
- Gift: Ideal for VO artists, podcasters, musicians, and vloggers, our affordable Blue Yeti accessories with advanced shockmount components, enable premium quality sound without the financial reverb!
How To Make An Audiobook: FAQs
What are the benefits of turning your book into an audiobook?
You’ll earn more money from book sales and more and more readers, particularly those of non-fiction like to consume audiobooks over Kindle or print. It’s also a good way of finding and serving a different audience who don’t buy traditional books. Audiobook listeners aren’t always readers!
What are different ways to create an audiobook?
You can record an audiobook yourself and work with an editor before self-publishing it. Alternatively, you can use a service like ACX of Findaway voices to find a narrator who will record and edit the book for you. The former is cheaper and slower. The latter costs more but is easier.
How much does it cost to turn your book into an audiobook?
If you decide to record and narrate an audiobook yourself, budget for up to $500 on equipment and on working with an audio engineer. Hiring a narrator and editor will cost you over $1000. That’s an approximation based on an audiobook 40,000 words in length. Professional narrators with additional experience will cost more depending on the contract.
What tips and tricks do you recommend for publishing an audiobook?
If you’re happy to narrate your audiobook, break it down into milestones that you’ll tackle each day. For example, aim to record one to two chapters every day rather than the entire book at once. That, way you can send files to an audiobook engineer and get feedback on issues and mistakes. It’ll also feel less tiring.
If you want to avoid narrating the book, consider using a service like Findaway voices. They will help you find a narrator and distribute your book to popular stories like Audible, Google, Kobo, Apple Books and many more.